Thursday 27 March 2014

Bit of a quiet week...

This week I've been doing a lot of resting, rather than baking. Although I've been doing really well in the last few weeks, this week has been a difficult one for me in terms of the M.E. What it basically means is that despite chomping at the bit (and anything else I can find. I eat when I'm low, so if it ain't nailed down, I've probably eaten it already) to bake, I've been resigned to theoretical work instead. Studying for my Open University course, doing business admin and getting to grips with my new website. That's right, a proper website! Ooooh!!

So here's the fun part of it; my new website address: www.buttercupbakerybournemouth.co.uk. Because I reeeeaallly like alliteration!

The website is really only in its early stages at the moment. My WONDERFUL friend, Emma Pegg, has been generous enough to design me a logo! I know everyone's already okay with its current incarnation, but it was a theme I chose on VistaPrint and I need something unique. So, here are the ones Emma has come up with:


I can't even decide which one I prefer! But I'm thinking maybe the blue-green one. What do you think? By the way, if you like these logos, you should see the other things Emma has come up with. You can check out her online portfolio on her website: http://emmapegg.wix.com/designportfolio.

As for recipes, I have a few plans in the pipeline on the cheesecake front. Right now, I'm thinking of the following possibilities:

  • ooey gooey toffee
  • put-the-lime-in-the-coconut
  • rum raisin
  • bakewell 
All I need now is the energy to make them and some willing volunteers...!

Sunday 23 March 2014

Funny Feet are back! AND they're gluten free!

Last night I was casually scrolling down the latest posts on Facebook when I came across a pic of a friend's daughter sucking on a bright pink foot. Not something you see every day. In fact, not something I've seen since I was about 10.

Funny Feet.


If you were born prior to 1990, you'll probably remember these ice creams. A Walls strawberry ice cream in the shape of a foot on a traditional wooden stick. It doesn't sound like a big deal but to those of us who remember them, they are one of the holy grails of ice cream.

Excited is probably the most understated way to describe my glee as I hopped around from one of my own funny feet to the other, desperately trying to call my whole family to give them the joyous news. Having ascertained (thanks to the wonders of online shopping) that they were both gluten free, and cheaper in Asda than they were in Sainsburys, I resolved to wait until I next went into town.

And then this morning I caved and went to Sainsburys anyway. Whoops. But ahh...the taste is just as I remembered it. Kind of like a frozen strawberry mousse. Slightly chewy in texture but melty and delicious at the same time.

If, like me, you're desperate to suck on a funny foot again, you can buy a 4-pack of them in Sainsburys for £2.50, or Asda for £2.00 (on special offer at 2 packs for £3 at the time of posting). Yay!

Wednesday 19 March 2014

Smooooooothie - a recipe!

Wohoo!! Winter is ending and Spring is poking a sneaky toe round the door. The weather is warming up and thanks to our very mild winter, the summer fruits are making an extra-early appearance this year.

To celebrate the early fruity fayre, I managed to track down a large supply of strawberries, so here's a fantastic fresh fruit summer smoothie that's loaded with healthy stuff. Enjoy!


Ingredients

6 large fresh strawberries
1 large ripe banana
1tbsp good-quality natural yoghurt (NOT low-fat - it commonly has more sugar AND fat!)
150-200ml fresh orange juice

Roughly slice the strawberries, and chop the banana in two. Throw in a generous tablespoon of the natural yoghurt, top up with the orange juice and blitz thoroughly in a blender. Add a straw and serve immediately, with some ice cubes if you want to make it reeeaallly cold.

Personally, I love this smoothie, but I can't take the credit for it, as I first encountered it around 4 years ago at a very small smoothie shop in London, the name of which I no longer know. It was delicious so I rushed home and recreated it until I got it just right. Perfect for a sunny afternoon!

Tuesday 18 March 2014

Cheesecakes!

The excitement!!

After much deliberation, and having noticed that our local supermarket was running a special offer on strawberries, I decided to have a bash at two different types of cheesecake: pear and ginger, and strawberry.

Now, this would be a real issue if I'd had to make a large cheesecake for both, but my brilliant father found two 12cm cake tins on special offer in Sainsburys - each one just a quarter of the size of my 'normal' tins. Score!

So...here they are.


Please excuse the terrible photo. I'm afraid our appetites got the better of us and we dove in before I realised I hadn't take a picture yet. Oops!

Anyway, the pear and ginger needs a little more pear. I blitzed a pear and a half into puree, along with about an inch of root ginger. Well, you can taste the ginger perfectly, but the pear is a little lost, so we'll definitely need more pear next time, but the overall flavour is pretty good.

But the STRAWBERRY!! Oooh...well, you can probably tell we liked it, given that it's half eaten in the photo! It has around 5 large, fresh, juicy strawberries, pureed to oblivion and folded into the soft cheese. Each bite is perfectly sweet and creamy, and contrasts perfectly with the shortbread biscuit base.

So the strawberry will be making it to the product list, and the pear and ginger needs a little more work. And I now have a belly filled with happy cheesecake goodness. Happy days!

Saturday 15 March 2014

My First Sale!

I'm only slightly ashamed to admit that when I thought about my first stall, at the Bournemouth and Poole Coeliac Support Group's AGM and fish and chip quiz night, I tried to imagine it as a great success. I thought, if I was lucky, there'd be a nice clamour of people around the stall and I'd sell out of everything, especially since I didn't think I'd made enough.

Ahh...reality. Why does it always hit you with a slap around the face, rather than creeping in quietly so you have time to prepare?

First off, I actually managed to finish everything (yay!). And it all looked pretty good (double yay!). We got out there on time and set everything up...I think we did a pretty good job, all in all. What do you think?

L-R: Millionaire's shortbread and rocky road; lemon and lime cheesecake (on stand); cherry bakewell cupcakes; double chocolate fudge cookies and triple chocolate chunk cookies; chocolate caramel swirl cheesecake (on stand).

Anyway, the doors opened at 7pm and members of the committee began buying things just before. Over the following 40 minutes, I sold all of the lemon and lime cheesecake, most of the chocolate caramel swirl cheesecake (still don't understand why citrus is more appealing than chocolate!?), and around half the cupcakes. However, I only sold around 1/4 of the cookies, a few millionaire's shortbreads and TWO rocky roads.

Now, everyone in my family and my friends are doing their best to convince me the money I made is actually very good. I, on the other hand, am a bit on the crushed side. I know that I was using this as a 'dry run' to see how things went, so it's a learning experience rather than outright failure, but damn, I feel crappy about it!

But, focusing on the learning curve, this is what I have learned:

1) Whatever you think you might sell, make slightly less. It's better to sell out than have masses left over that you can't sell.
2) Cheesecake is MADLY popular! MAKE MORE CHEESECAKE!
3) Some people will always be unhappy. One woman stood at a distance, peering at the stall, complained that there was 'nothing there but chocolate' and even when her husband tried to convince here there WERE non-chocolate options, she grumped and walked off. You can't win over everyone.
4) ALWAYS have someone else there to work the money. I have serious troubles with numbers. So when a woman bought £4.50-worth of products, handed me a £10 note and a 50p piece to 'help', I panicked, and ended up having to call my husband over to help me work out what I was meant to be giving as change. I am bad with numbers at the best of times. But under pressure?! Meh!
5) Leftovers are dangerous. Today I have eaten a huge piece of millionaire's shortbread and a couple of cookies. And I'm contemplating another.

But onwards and upwards! I'm keeping my spirits up and hoping to do better next time. I'd like to try Wimborne Market next, to see how I can do there. I also want to try a few local cafe's to see if they'd be willing to stock some things. Will keep you updated on how I get on.

Until next time, food fans!


Tuesday 11 March 2014

Ooh La La! Genius Croissants, Reviewed

That's right folks, today we're taking a little trip across the English Channel to France. Unfortunately, the only French I know means 'I am 13 years old' so I'll have to do all this in English.

If you're a fellow coeliac, you're probably already aware that the good people at Genius have released all-new croissants. You might recall they previously had sold this product, but after taking off their shelves, it seems they've worked their magic on them because not only are they back, they're more delicious than ever!

Let's start with the price. At £2.75 for two (reasonably sized) croissants from Tesco (they're also available in Asda), these are more of a decadent treat than a regular purchase, working out at around £1.35 each. This is less than you'd pay for a 'normal' croissant in, say, Starbucks, although it's worth bearing in mind they are larger than the Genius croissants.

The instructions on the pack say to heat in the oven for 9-10minutes at 190 degrees C. Refreshingly, these instructions turned out to be accurate. I say this with my tongue firmly in my cheek, as we coeliacs are all-too aware of how often heating instructions (albeit not those provided by Genius) turn out to be inaccurate.

Having removed my croissants from the oven, I let them cool before I feasted. I'm delighted to say they remained light, crispy and flaky, rather than reverting to tiny blocks, a la most gluten free items you have to heat before eating.

I chose to have mine with salted butter and good-quality set honey - a truly sumptuous breakfast. And ahh...that first bite. Little flakes of pastry crumbling away and melting on the tongue, finishing with a buttery sweetness that tells you you're eating something truly sinful but worth it. Those few extra pounds on the bathroom scales? Pah! Worth it. And I must say the butter and honey complemented the croissants perfectly. Another time, I think it would be worth turning them into almond croissants and pairing with some fruit and a good cup of coffee. What a perfect start to a busy day!


Saturday 8 March 2014

Genius Puff Pastry - A Review and a Recipe for Ratatouille Pie


Gluten free puff pastry?! There's no such thing, is there? Well, thanks to those clever bods at Genius, there is now! My Dad bought me a pack to try and immediately my brain started to whirl with the possibilities. Ahh...to do pastries or to do something savoury? Eventually, I settled on a pie...a ratatouille pie! Yes! Excellent!


The one major issue with this pastry is that it comes as one huge block, rather than two smaller blocks. This is obviously so you can use it for something really large, but as it needs to be used within 24 hours of defrosting, it would be more convenient in two pieces.

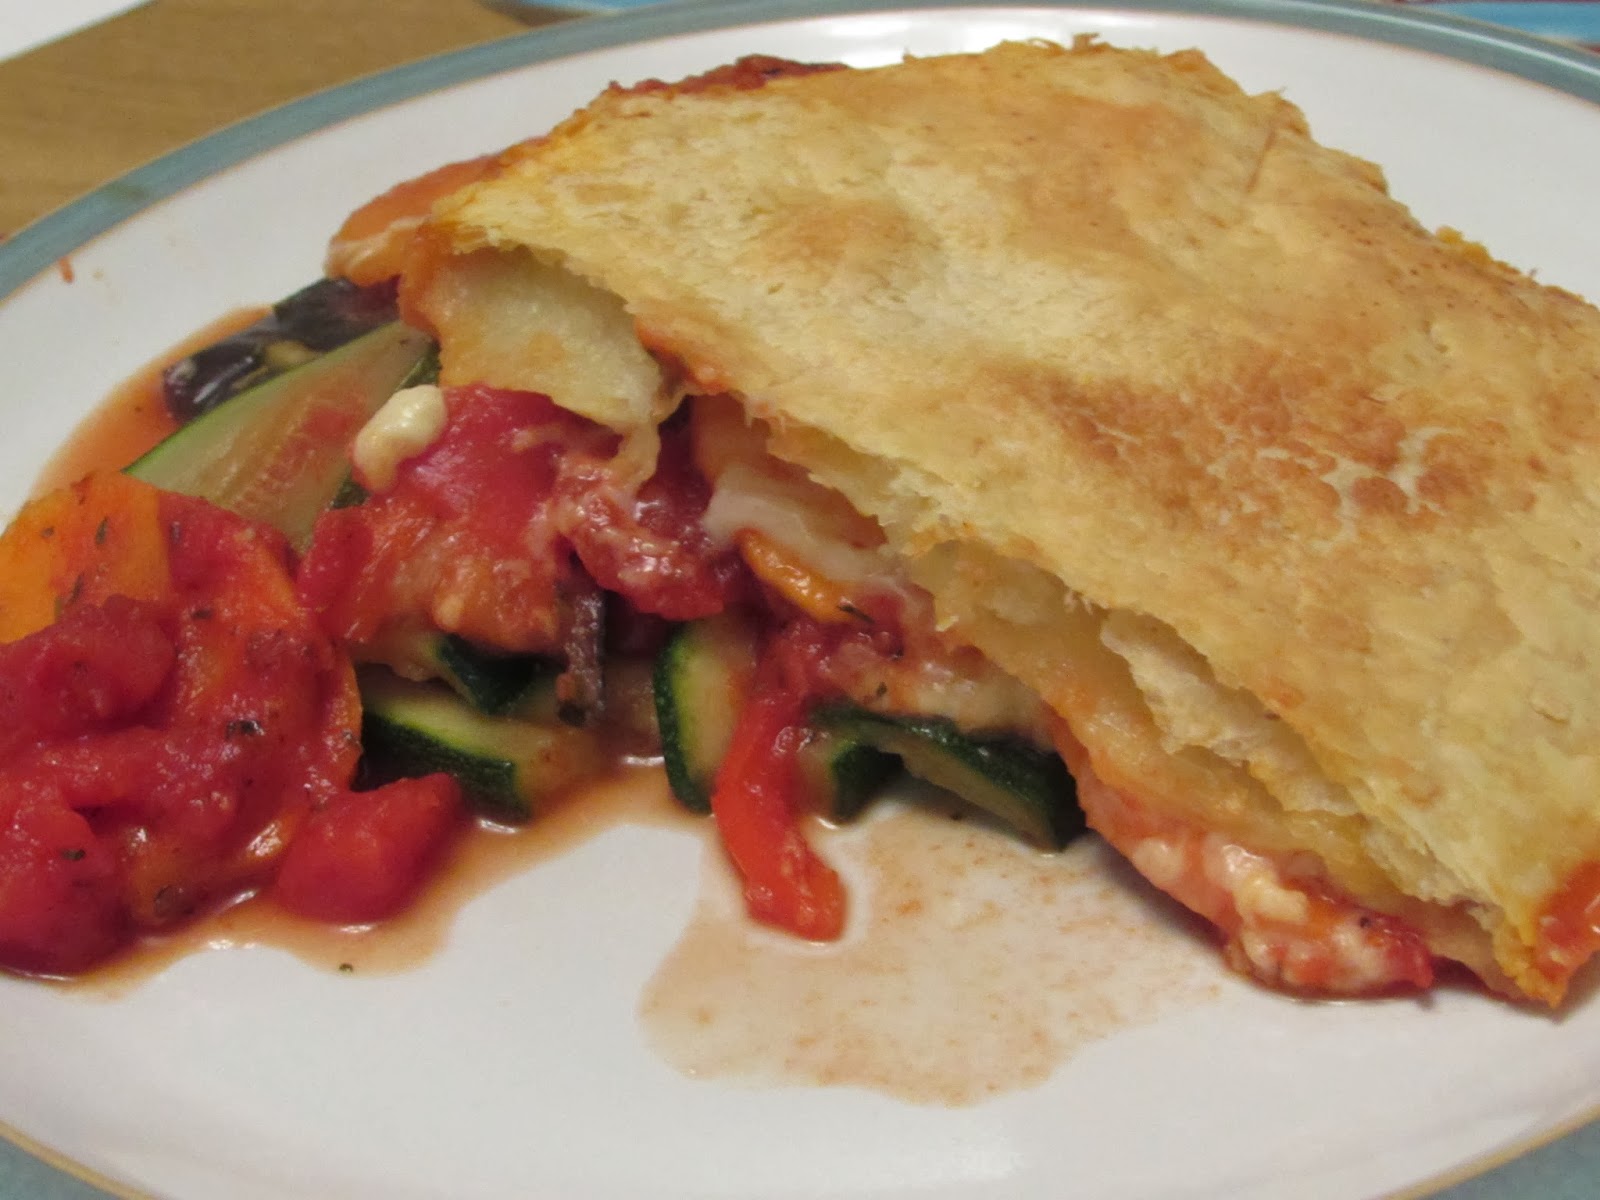
Rolling it out once defrosted (around 6-8 hours, depending on house temperature) was a doddle, and I must say it puffed up pretty darned well! We brushed it with a little milk for that 'glossy' look, and although it was slow to puff up - it started after about 20 minutes in the oven - when it did puff it rose by about an inch. But eating the pastry was the real treat. It tastes just like the puff pastry I remember. Delicate without being too crumbly, flakey and buttery. When you bite into it, it manages to have a crisp bite, yet it melts beautifully. Overall, it worked incredibly well and our dish would have been far poorer without it. I will DEFINITELY be buying this pastry again.


Want to know how to make this delicious, yet healthy pie? Here's the recipe!

Ratatouille Pie - serves 3-4

1 large courgette, thinly sliced
1 large aubergine, thinly sliced
1/2 large bell pepper, cut into strips
4 large cloves garlic, minced
40g grated parmesan (or, if you prefer, 60g extra mature cheddar)
1tbsp each dried rosemary, thyme, oregano and basil
300g passata (sieved tomatoes
100g chopped tomatoes
1/2 pack of Genius Puff Pastry, defrosted
Salt and pepper to taste
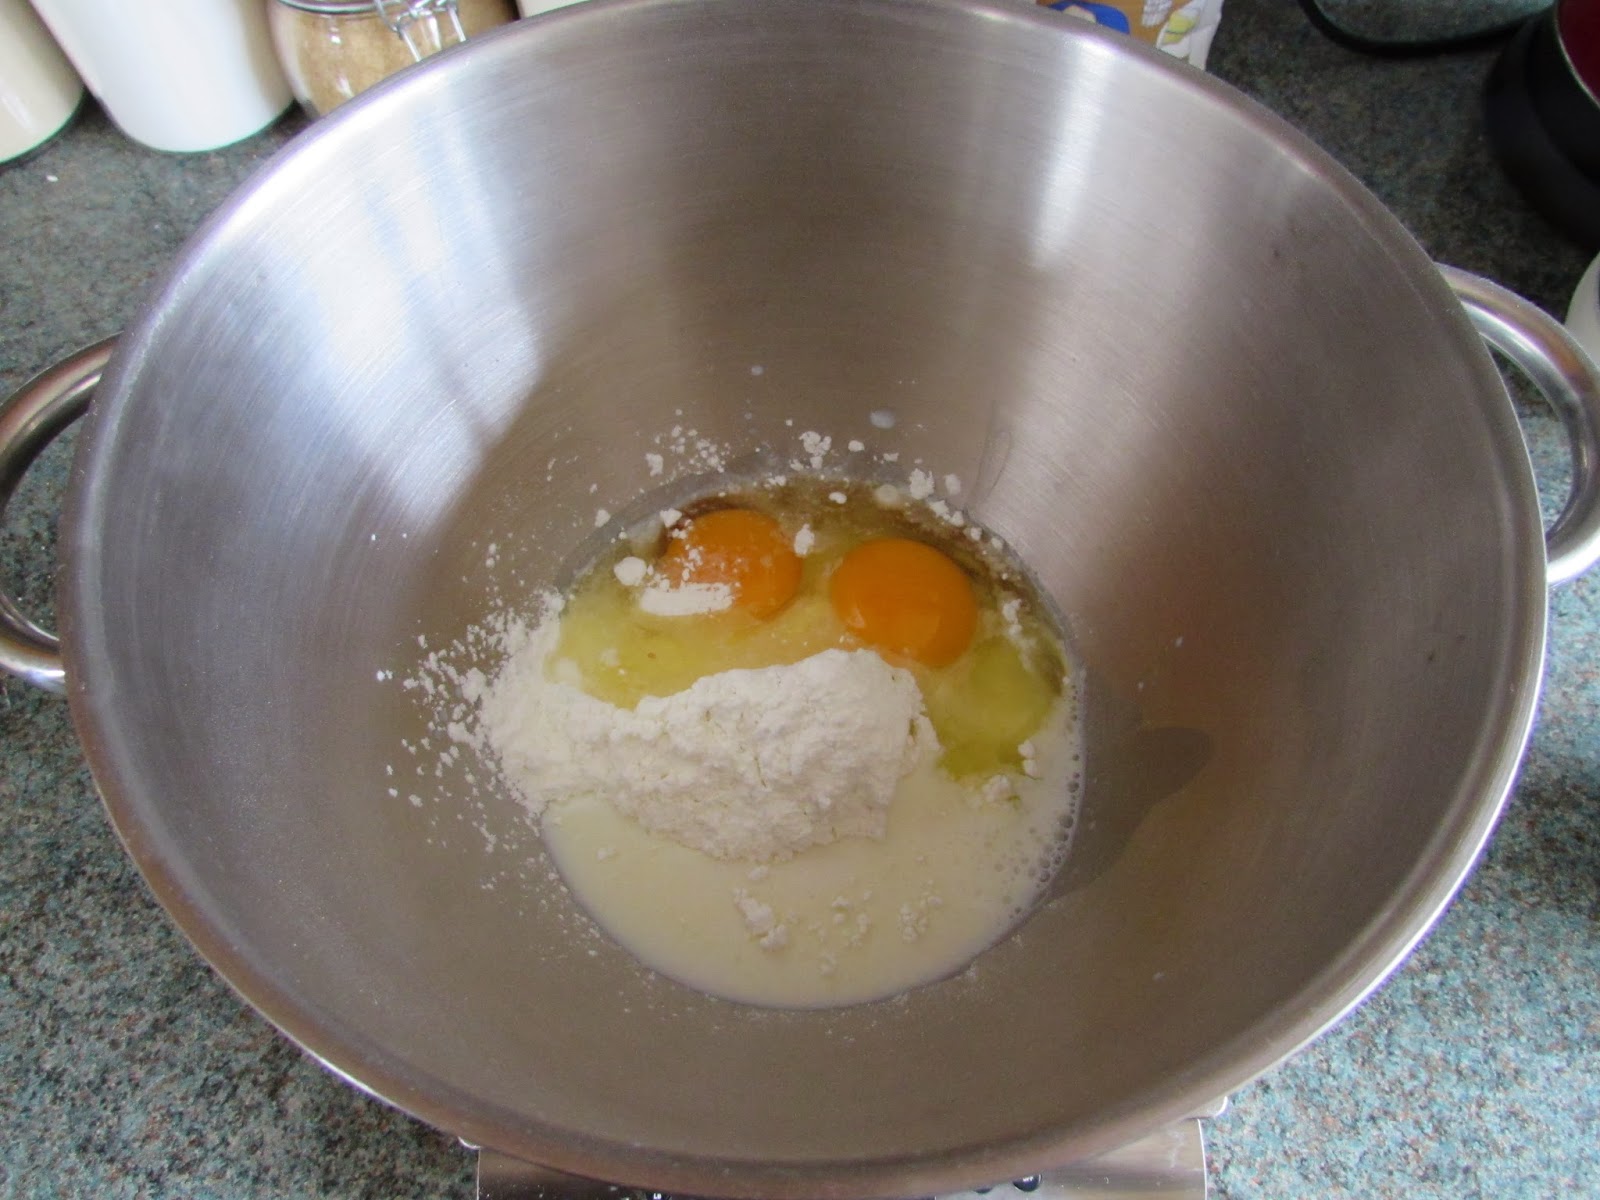
1 egg cup of milk
Deep lasagne dish or casserole dish. (We used a lasagne dish around 22cm x 10cm)

Dry-fry the aubergine slices until each side is golden brown, then line the bottom of a deep lasagne dish with them, spreading evenly.  Layer the courgette slices evenly on top, and sprinkle salt and pepper over the top. Add the pepper slices, then repeat the three layers. Add more salt and pepper.

In a saucepan over a low heat, lightly fry off the garlic - but don't let it go brown or it'll be bitter - then add the passata, chopped tomatoes, all the herbs and season well with salt and pepper. Turn the heat up to medium and let it bubble away for 10minutes. Spoon the mixture on top of the vegetables, giving the dish a little wiggle to help it work its way between the layers. Sprinkle the cheese on top.

Roll out the puff pastry until it's around 5mm thick and big enough to cover the top of the dish. Place it on top, then remove the edges with a sharp knife until it's covering the cheese, but not overlapping the edges of the dish. Brush the pastry with milk, then place in the oven at 200 degrees C / 400 degrees C / Gas Mark 6. Leave for 25-30 minutes, or until the pastry has puffed up and turned a golden brown. Serve piping hot, with a side salad if you wish.


Friday 7 March 2014

Cookie Chaos!

Hello, good afternoon and how the devil are you? Good? Marvelous!

Will you allow me to eulogise for just a moment on the topic of cookies? When I was about 14, my Dad got my sister and I into the habit of going to do the weekly shop with him every Thursday night. This was turned into something of an event for us, as we were given £10 each with which to buy the food for our packed lunches for the week, and we were allowed our own trolley each. Ooh, the excitement!

I promise, I'm getting to my point. Bear with me.

I would buy the cheapest possible bread, crisps, almost everything in fact. Because what I wanted more than anything was a double chocolate chip cookie from the Bakery counter. This wasn't just a cookie. It was a large cookie that was thick and soft and chewy, and taking a bit of it was as close to heaven as my 14 year-old self could get. Washed down with a glass of milk, it was to be savoured, bite by bite, really enjoying the chewy gooey-ness of it.

Of course, when I was diagnosed with the coeliac disease, I knew that cookies would leave a big gap in my life. Aaah, I hear you say. But there are LOTS of cookies on the market you can eat! Unfortunately, not, dear friends. Because almost all of the best ones contain oat flour, something I only recently learned I can't eat, my attempts to create great cookies has stepped up a notch. After all, I can't be the only coeliac who misses these cookies but can't eat oats?

Well...I've had two failed attempts this week. They've had all the stability of a nervous breakdown (something they almost drove me to, trying to make them) no matter what I've tried! Less egg. Different sugars. Different types of flour. BAH.

But today, finally. FINALLY!!!! I got it right! Less egg, light muscovado sugar instead of dark brown soft, and much less sugar. Et voila! Here we go. Delicious crisp but chewy, dense, perfect-for-dunking-in-milk cookies, that I'll be able to include in my products list (once I've fiddled with it a little more, anyway). Soooo many possibilities! So now, I think I deserve a cup of tea and a chef's prerogative. Until next time...


Wednesday 5 March 2014

Lorraine Pascale!

Okay guys, here's some exciting news.

A week or two ago, one of my favourite chefs, the beautiful and talented Lorraine Pascale, asked for her Twitter followers to tell her their 'inspiring stories'. Having been through a tough time over the last few years, I decided to email it over and a couple of days ago, I received an email confirming her website was going to feature it!

Having excitedly told my husband, my Gran, my Dad and both my cats (who were very supportive, I'll have you know), I've been waiting in reserved patience ever since. But today it's up! My story and a link to my blog is there to be seen by any one of Ms. Pascale's loyal followers.

Eeeep!!!

Here's a link to the story: Living My Life for ME, not M.E.

If you haven't seen Lorraine Pascale's website already, it's a great one to check out here.

Tuesday 4 March 2014

God Bless The Chickpea! Two reviews.

As much as I enjoy cooking, I'm always on the lookout for something new and interesting to eat that I can buy from a local shop. This is partly because I'm on the committee of the Bournemouth & Poole Coeliac Support Group, so I like to find new things I can recommend to our members when I produce the newsletter. But it's also because, for me, there are few things more exciting than something new to try.

So just imagine my joy when I came across these little beauties in our local Makro (and yes, there are two missing...*ahem*...:


These falafels are just one of the new options on offer from the Great Food Braver With Flavour range, which includes:

  • Moroccan Falafel 
  • Mediterranean Falafel (pictured) 
  • Sweet Potato Pakora
  • Original Falafel
  • Spinach and Pine Nut Bites
 I decided to try the Mediterranean Falafel, which I paired with the Tesco Finest Slow Roast Tomato Houmous, pictured below.


The falafel can be eaten cold straight from the pack or you can heat them up for 8-10 minutes at 180 degrees C. You can also heat them in the microwave for 2-3 minutes, making them perfect for a working lunch.

I tried them cold first, splitting one open to see the inside, where I could see pleasingly large chunks of chickpea still intact. The immediate flavour is a little spicy, without overpowering the flavour of the other ingredients. The texture is dense and crumbly, which means they fall apart when you chew, but can be a little messy to eat if you don't want to look too greedy by stuffing a while one in your mouth in one go!

But it's when you heat them that they really start to shine. The crumbly nature is reduced and the heat from the spice is brought out, along with the flavour, which really does burst into life on the tongue. Of course, all falafel should have some form of accompaniment, so I dunked them in the houmous, which, if anything, helped bring out the flavour any further. Tomato is a great side for most savoury foods, and this houmous proves the point. I'm sorry to say that the entire pack you see pictured at the top was scoffed down in one go, along with most of the houmous (the remainder of which will last in the fridge for 1 day after opening, so will be used for fresh sliced veg tomorrow).

You can buy Great Food's Braver With Flavour products in Asda, Tesco, Morrisons, Ocado, Sainsburys and Costco, at varying prices (the falafel were £3.99 in Makro but £2.40 in Tesco). For more information, check out their website: Great Food.


Sunday 2 March 2014

Step-By-Step To Perfect Banana Pancakes

A few weeks back, I posted my recipe for the perfect banana pancakes. Since then, I've revised and improved the recipe, so it's possible to get an even better result. So if you want to try something new for Shrove Tuesday, give these bad boys a go!

Ingredients

135g gluten free self-raising flour (I used Dove's Farm but there are, of course, others)
200ml semi-skimmed milk
2 large eggs
20g melted unsalted butter
3 large ripe bananas

Method 

Put the self-raising flour into a large mixing bowl. Gluten free flour tends to be extremely light, so you shouldn't need to bother sieving it (sometimes, coeliac disease makes life a lot easier!)


Throw in the milk and both eggs. The milk can be cold, but the eggs should be at room temperature. 


Cut off 20g unsalted butter   

Melt the butter. You can do this in a saucepan, but it's much easier to blitz it for 40 seconds at full power in a microwave. 

Pour the melted butter into the mix SLOWLY. It's tempting to chuck it in all in one go, but doing so will chill the butter and you'll get tiny lumps of solid butter in the mix. If that happens, the pancakes will be too firm instead of light and fluffy. So take your time with this.
 

Time for the bananas! Now, it's tempting to throw bananas out when they look like these two, but actually, the skin goes black long before they're bad on the inside. These guys were perfect for these pancakes.

Bananas that are just ripe will also work perfectly well. I took the last banana from this bunch.  

The riper the bananas, the easier they are to mix in because you don't need to mash them first (see how easy this is!?). Just lob the ripest bananas straight in. Less ripe bananas can be added a bit at a time, while the machine is mixing. Just break off a chunk of banana and drop it in the batter.

Once you've mixed it all in, the batter should reach this consistency. See the way it's dripping off the beater? It should be quite runny like this, but not be watery at all. If it seems a little thick, pour in a little more milk (slooowwwllly!) while mixing until the batter is looser.

One of the biggest mistakes, when making pancakes, is the heat on the hob. This is the setting I use every single time I make pancakes, and I begin heating the pan on this setting about 10 minutes before I want to cook the pancakes. Have you heard of the 'first pancake' rule? It suggests that the first pancake is always a throwaway because it's a bit rubbish. You can avoid wasting good batter by properly heating the pan first.

Next you need to grease the pan. I use Flora Cuisine but ultimately, you can use any form of butter or spread. The pan should be hot enough by now that the butter will melt and bubble like this, smoking a little at the same time. This means the pan is good and hot. Perfect timing! Once it's melted, use a couple of folded pieces of kitchen roll to wipe it all round the pan. You don't want to put pancakes in grease, or they'll be oily.

When you're ready, use a ladel to pour the batter into the centre of the pan. The ladel should be almost full for a bread plate-sized pancake but you could make a few smaller 'Scotch-pancakes' instead for children.

See all those teeny bubbles in the batter? These should appear after about 20 seconds and they tell you that it's time to flip the pancake. It will also start to firm up and change colour a little around the very edges. I find it's best to use a metal spatula or fish slice for this. Be confident, slide the tool under the pancake in the middle and....FLIP! (Note, there's no real point in trying to flip the English pancake way. Although it's distinctly more fun, it'll knock air out of this pancake and probably make a lot of mess, as there will still be liquid batter on the top.)

And this is what it should look like on the top. It should start to puff up a little as it cooks on the other side. It will take a little longer to cook on the bottom...roughly an extra 30 seconds, but you can always flip it to check and then flip it again to cook it a little longer.

To keep the pancakes hot while you're cooking, it's a good idea to have the oven on at 100 degrees C / 225 degrees F / Gas Mark 1/4. 

Et voila! The perfect American-style banana pancakes! Ready to top with Nutella, golden syrup or even a freshly stewed fruit compote.

Have a great Shrove Tuesday, everyone!


Saturday 1 March 2014

MASSIVE Pre-Gig Nerves! 

Hellloooo and welcome to another post! 

Well, I'm officially less than two weeks away from my very first attempt at selling my own products and guys, I have to tell you, I am bricking it! 

Every time I think I have everything completely organised and sorted (public liability insurance, food hygiene certificate, self-employment registration, etc), someone comes along and says 'You know, you should probably make sure you have this sorted' or 'Did you think about this?'. And of course, that leads me to a lot of face-palm moments. Which leads me to a lot of need to eat chocolate and drink tequila. But I digress. 

So...here's the list of things that I have left to sort, as of this afternoon: 

  • Pick up filing cabinet (insurance insists all docs are in a 'fire-resistant cabinet'
  • Set up a business bank account and PayPal account to go with it
  • Write terms and conditions for orders
  • Confirm price-per-product and make up laminated signs for stall 
  • Do I need basic bookkeeping? (GOD, I hope not!)
  • Buy a sellotape dispenser
  • Buy food handling gloves so I don't stick a finger in a cupcake by accident 
  • Practise making millionaire's shortbread and choc caramel cheesecake again
  • Make a shopping list and yes, BUY everything on the shopping list 
  • And, oh yes, actually bake everything for the stall! 
Doesn't look so bad, does it?

And yet, my excitement is still tempered by fear. What if nobody wants to buy anything? What if people don't like the things I bake? What if I short-change everyone and drop the food when I try to put it in bags for them? What if I forget the bags altogether!? Or I run out of change!?

Of course, the truth is, I can't reasonably take care of all of these problems, so it's probably better to focus on little things. Starting with mint chocolate chunk cookies!

Now, I'll make a quick confession here - I really, really don't like mint. But, I hear that most other people actually really like it. So, these bad boys are a chewy dark chocolate cookie loaded with dark chocolate and chocolate mint thins, with a teaspoon of peppermint extract to bring out the sweet, sharp minty flavour. Verdict: they need a little more mint but these will be popping up as a purchasable item in the near future!

Keep an eye out for increasingly panic-stricken blog posts as the next two weeks proceed (and please, if you have any tips for keeping calm, let me know!).